Plesk is a great multi-function control panel capable of hosting different types of apps on a VPS, and I hope they continue to build on and improve support for Node apps.
This post shows how to deploy a Node based Next.js app to use with SSR or SSG, along with connecting to GIT for source-controlled continuous deployment.
Check out the finished git repo here.
(This repo has been updated from the second post on this topic)
Setting up Next JS
To install the latest version of Next.JS (13 at the time of writing) along with typescript, run npx create-next-app@latest --typescript. After it’s installed, check everything works with npm run dev.
To install Tailwind you can paste the following commands:
npm install -D tailwindcss postcss autoprefixernpx tailwindcss init -p
In the newly created tailwind.config.js file, copy the below text:
/** @type {import('tailwindcss').Config} */
module.exports = {
  content: [
    "./pages/**/*.{js,ts,jsx,tsx}",
    "./components/**/*.{js,ts,jsx,tsx}",
  ],
  theme: {
    extend: {},
  },
  plugins: [],
}
Replace everything in styles/globals.css with:
@tailwind base;
@tailwind components;
@tailwind utilities;
Project tidy up
Delete styles/Home.module.css
In pages/index.tsx, replace the file with the following:
import Head from "next/head";
export default function Home() {
return (
<>
<Head>
<title>Create Next App</title>
<meta name="description" content="Generated by create next app" />
<link rel="icon" href="/favicon.ico" />
</Head>
<main>
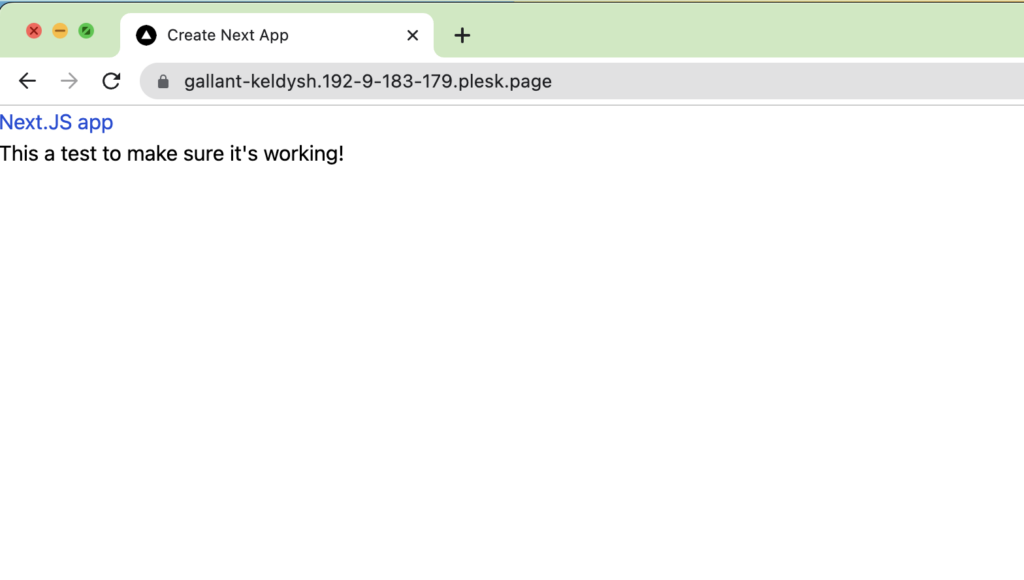
<h1 className="text-blue-700">Next.JS app</h1>
<p>This a test to make sure it's working!</p>
</main>
</>
);
}Notice we added the class name text-blue-700 to the H1 element. Run the dev command again to make sure Tailwind is working, and also check the api by going to http://localhost:3000/api/hello where you should see the default response:
{
"name": "John Doe"
}
Finally test building the app with npm run build. If the linter picks up an error with the apostrophe in the index page, add the second line to the eslintrc.json file:
{
  "extends": "next/core-web-vitals",
  "rules": { "react/no-unescaped-entities": 0 }
}
Add your files to a Git repo to use in the next step.
Setting up a domain on Plesk
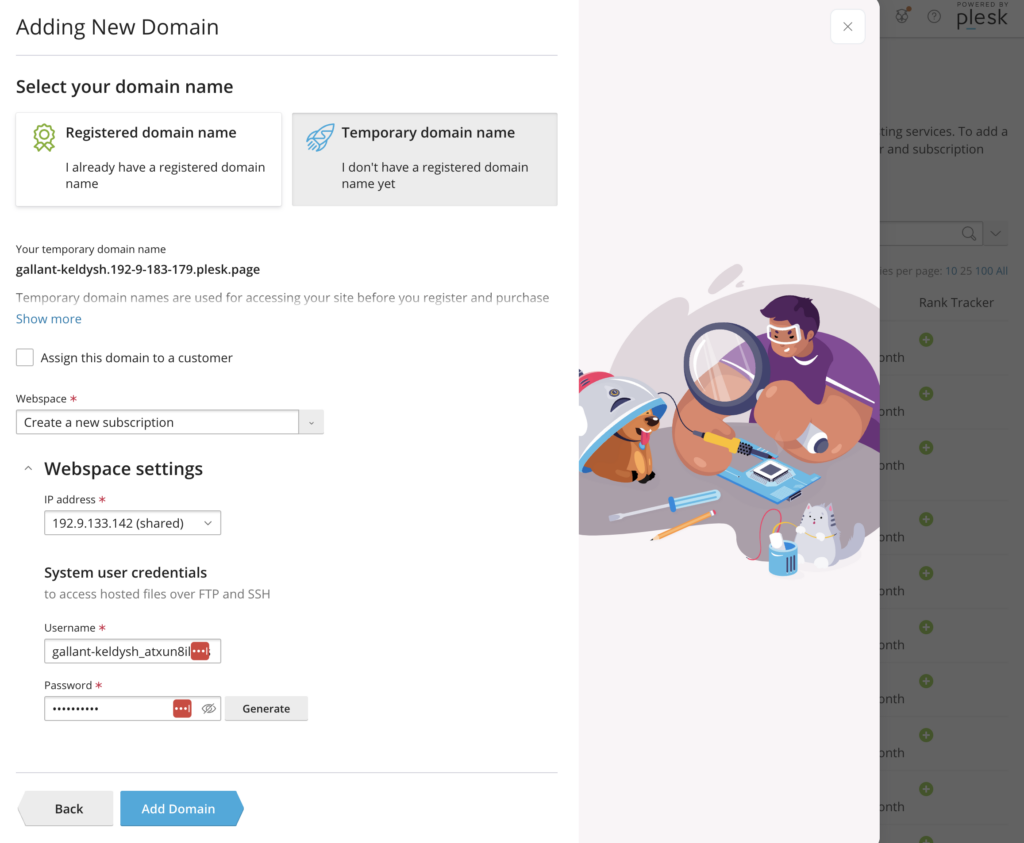
If you don’t already have a domain set up in Plesk, create a new temporary one under Domains > Add Domain. Select ‘Node.js application’ for the template, then choose ‘Temporary domain name’ and note down the credentials.
Git Integration
Next you can connect your domain to Git:
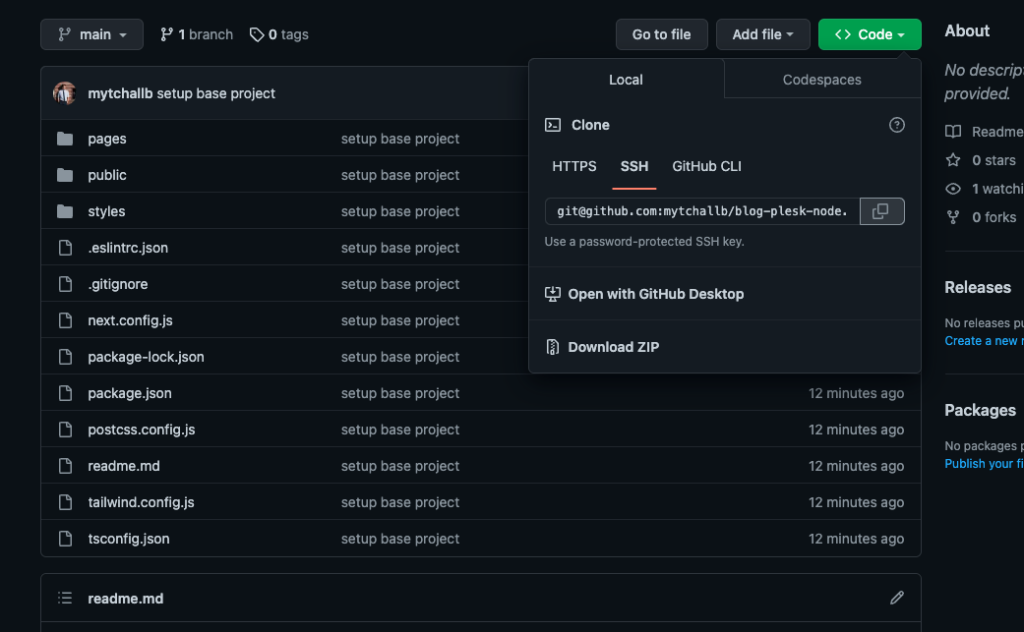
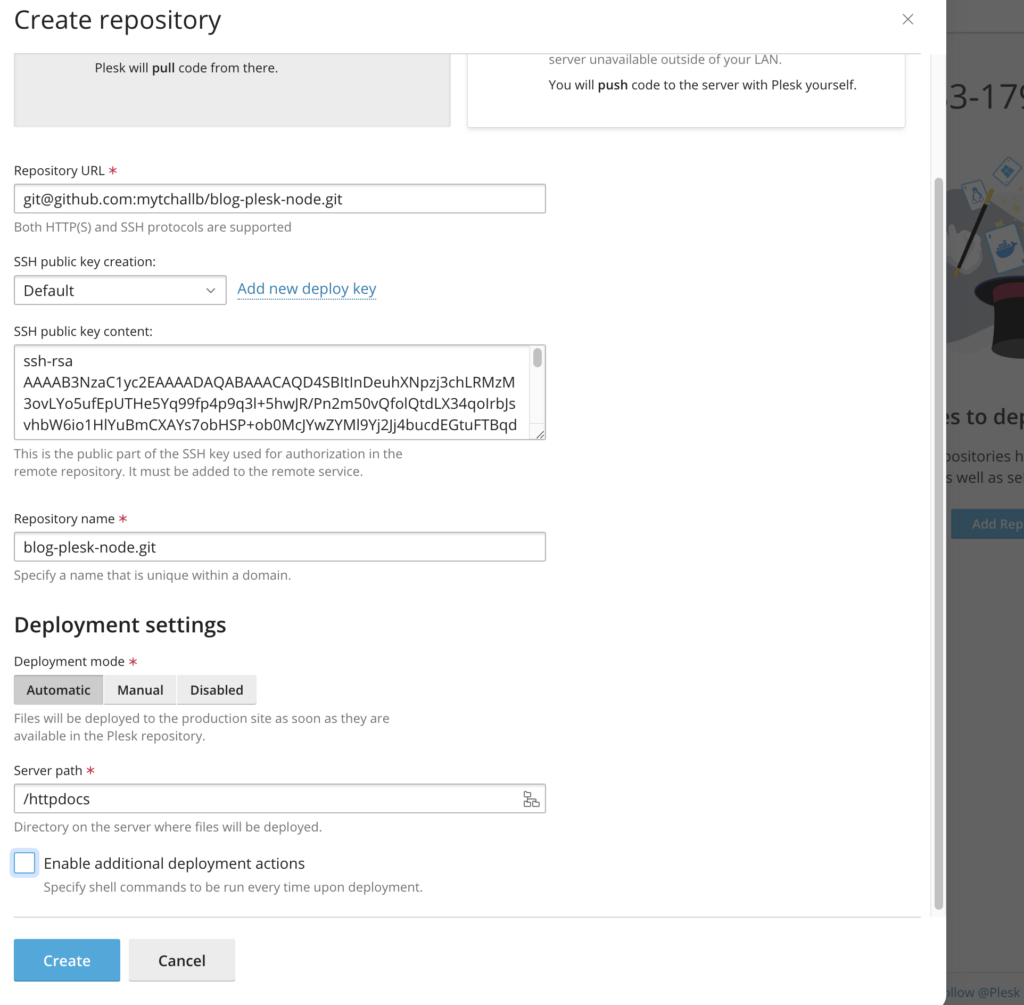
- Copy the SSH link from your git repo and enter it into Plesk.
- Get the ‘SSH public key content’ from plesk add add it into your git repo Settings > Deploy keys.

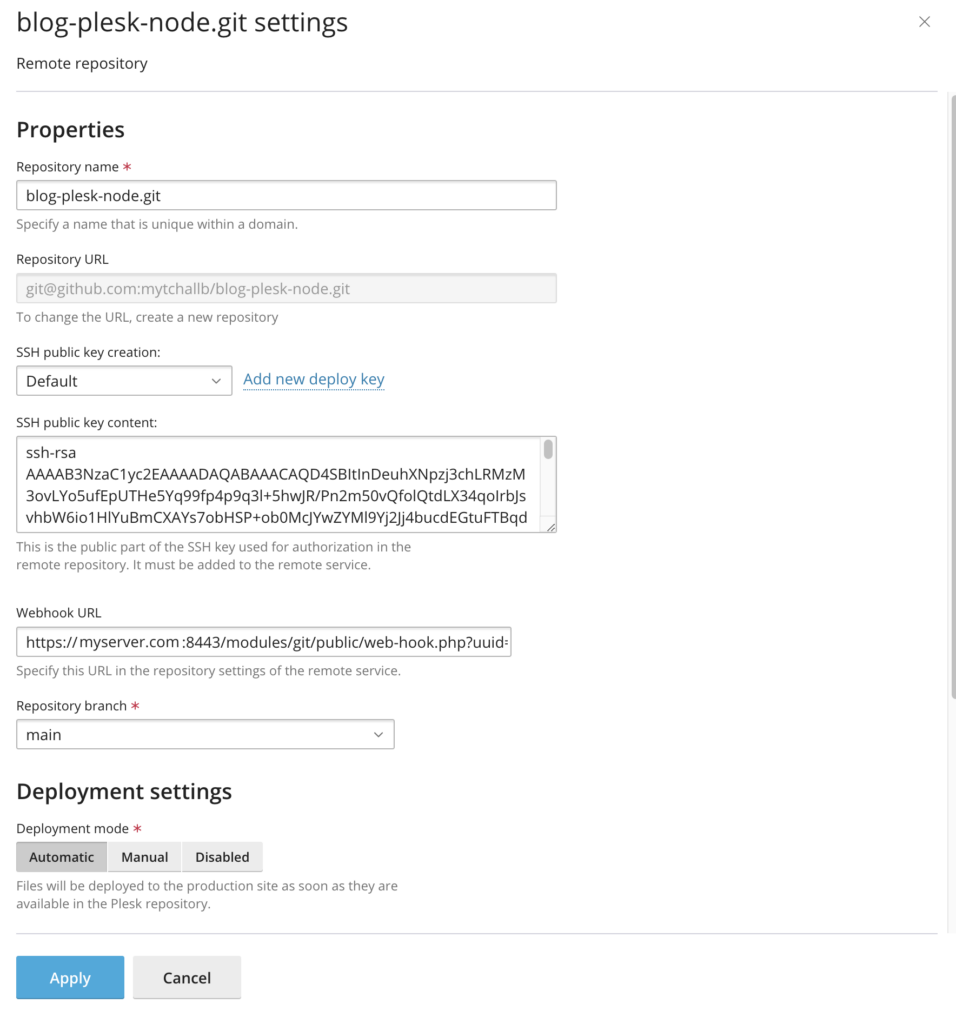
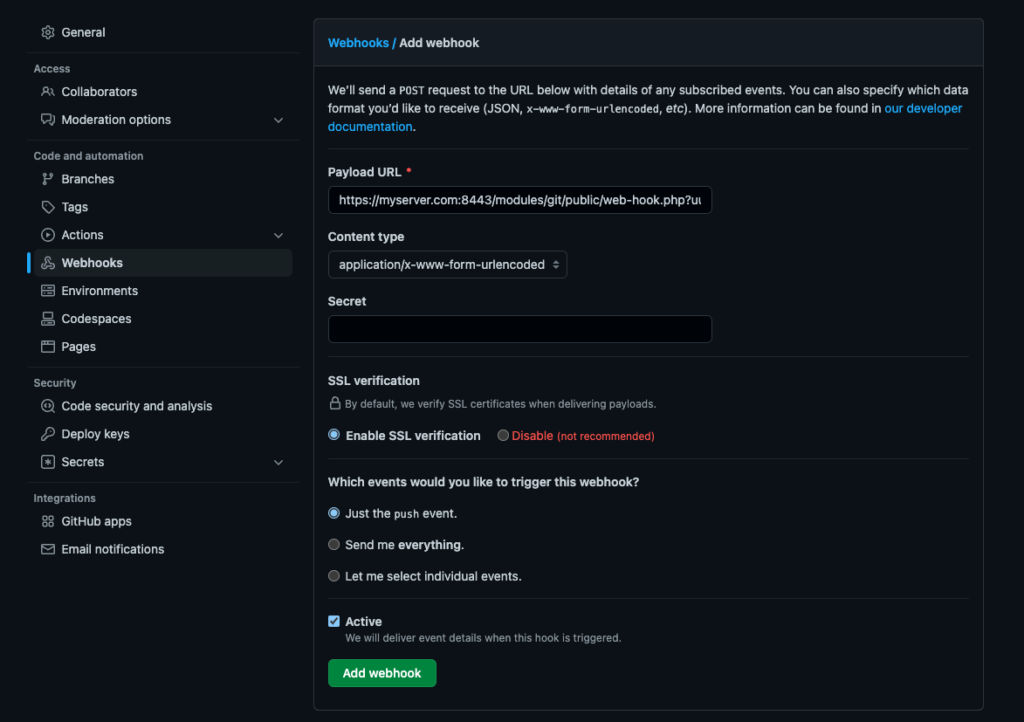
- Click Create/Save and go back into your Plesk Git repository Settings. You should have the ‘Webhook URL’ field which you can copy into your git repo settings under Settings > Webhooks.
- Lastly to enable auto-building, in the Plesk Git settings, click ‘Enable additional deployment actions’ and paste in the following under Deploy Actions:
rm -rf tmp
(PATH=/opt/plesk/node/18/bin/:$PATH;  npm install && npm run build &> npm-install.log)
mkdir tmp
touch tmp/restart.txt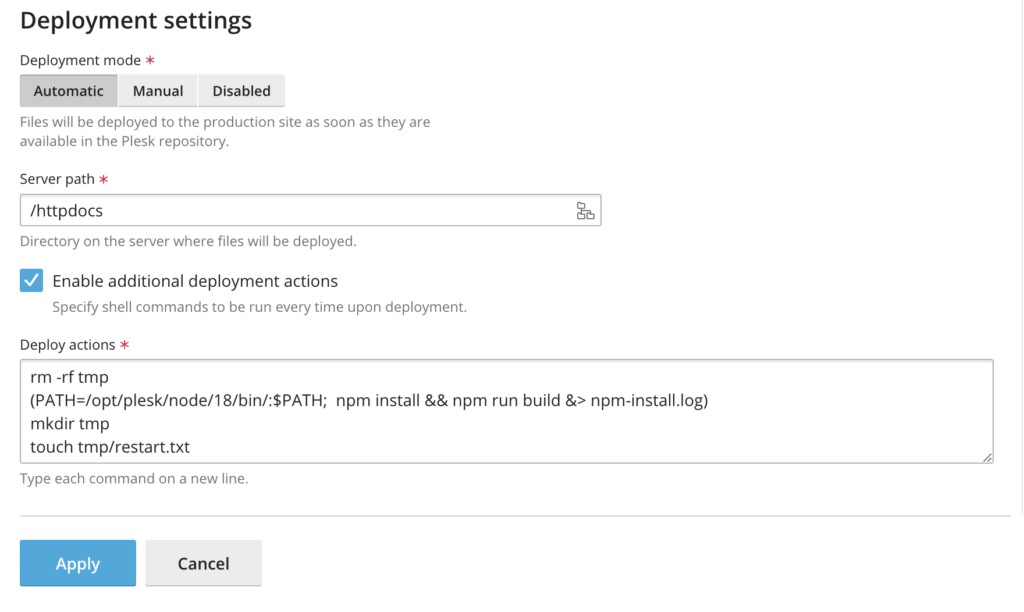
Note: You’ll have to change the node version from 18 depending on what you’re using in your Node.js settings for your domain.
Editing the Next JS start script
In order for Plesk to run a Next JS app, a config file needs to be changed via the SSH terminal.
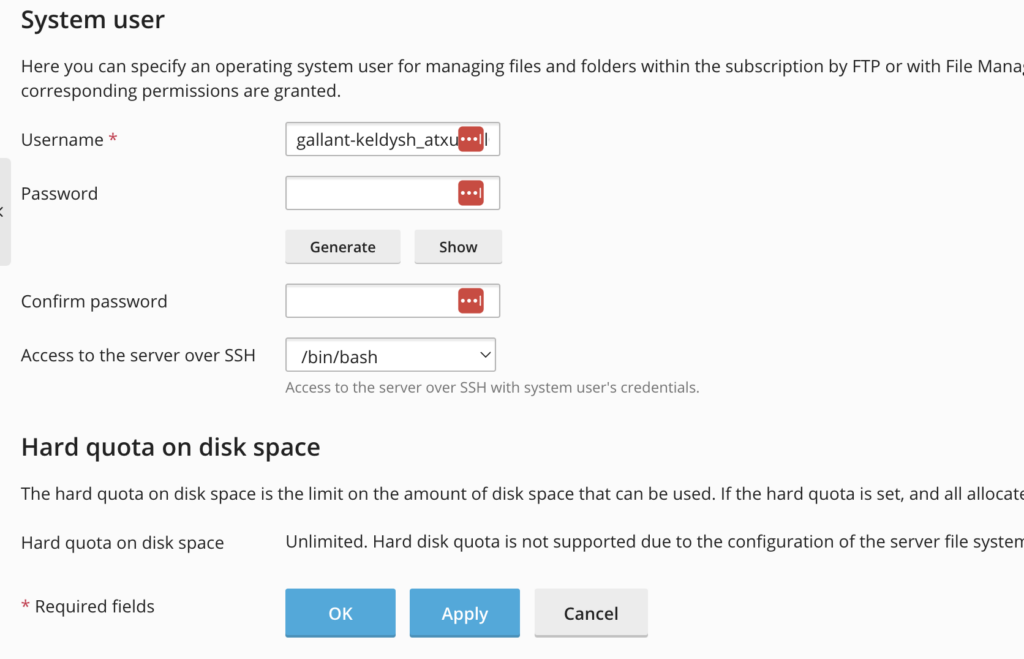
Under your domain settings, Hosting & DNS, click ‘Web Hosting Access’, and change ‘Access to the server over SSH’ to ‘/bin/bash’.
Back on the domain page we can now click under ‘Dev Tools’, SSH Terminal.
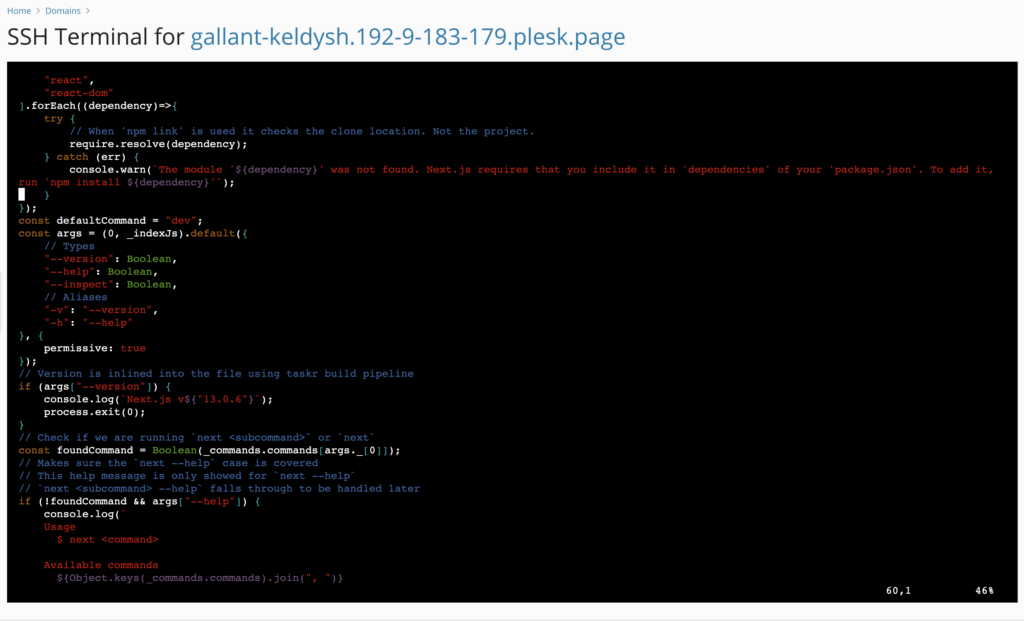
In the terminal, locate the ‘next’ file with cd httpdocs/node_modules/.bin and open it with the VIM text editor by running vi next.
Scroll down until you see const defaultCommand = "dev"
Press ‘i’ to enter Vim’s editing mode, replace “dev” with “start”.
Press escape to get out of editing mode and type “:wq” to write your changes and exit the file.
Finish the Node JS setup in Plesk
Back to your domain page under the Node.js settings make sure you’ve set the right paths as per the screenshot.
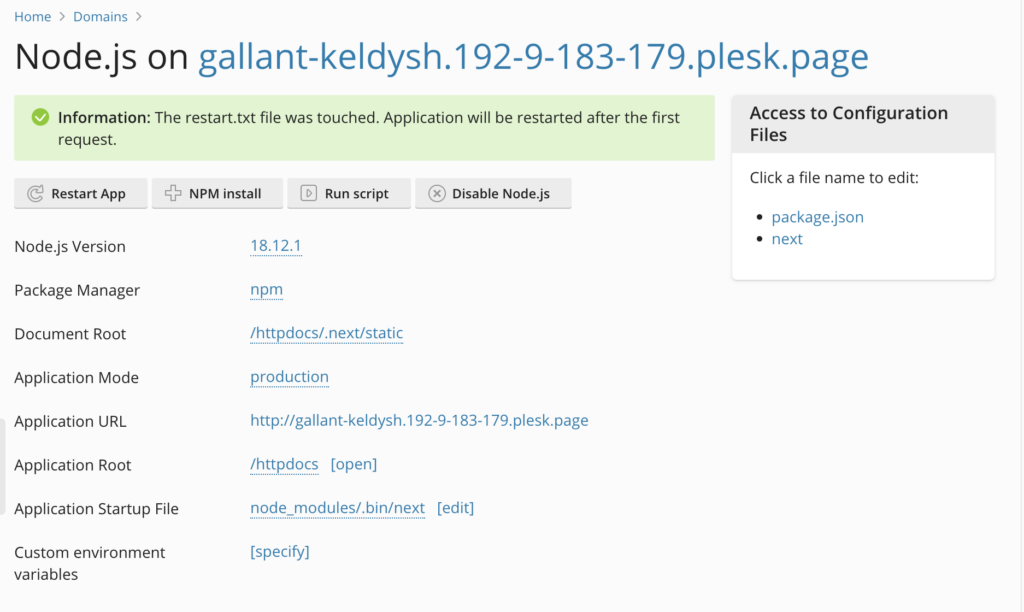
Click npm install. Then ‘Run script’ and run the build script (don’t need to add ‘npm run’). This will create a ‘.next’ folder in our project directory.
Lastly click ‘Restart app’ and navigate to your url, everything should be running! Check the api url is working too.
Note: In regards to Nginx reverse proxy it is configured automatically.
Auto-deploy
We have set up a Next.js project with auto-deploy from Git – go ahead and try changing your project’s index file, and pushing your changes to see Plesk rebuild the app. It may take a few seconds and in your Next.js directory you will see a ‘npm-install.log’ file showing progress of the build.
Something to note is while the app is rebuilt, your website will show a 404 page.
Taking it further
Right now your website folder in Plesk will contain the large node_modules folder used to build your site, read my next article Removing the build folders when deploying Next.js on Plesk to learn how to remove this since it’s not needed after building.
Conclusion
This is in some ways a copy of what services like Netlify, Vercel, Fly.io and Render offer – apart from building the app in containers and built in CDN, but you can control the hardware and usually at a lower cost!
Comments
Hello Mytch! Your post was really helpful the last several months. However, recently I had to update Plesk due to some issues with NodeJS (I couldn’t access the NodeJS config panel). I have configured everything again and now the server can’t serve the pages under dynamic routes. It does not find the .js file corresponding to that route (the file actually exists in the file system). This only happens in the Plesk server, in local it runs smooth.
For example, when going to the route:
{DOMAIN_NAME}/vintages/19
the browser prompts the following error:
GET {DOMAIN_NAME}/_next/static/chunks/pages/vintages/%5Bid%5D-bed4d957a762310f.js net::ERR_ABORTED 404 (Not Found)
What do you think could be causing this error?
Kind regards
Thanks Fiso!
Sounds like it’s not accessing things properly, either due to React Static Routing or the Plesk config.
Happy to take a look at your Plesk install if you create a user for me to log in with, or I can clone your repo onto my Plesk server and see if it work. I’ll send you my contact email 🙂
Hello Mytch! Thanks for your reply!
I found out that the server configuration was wrong under Domains -> [YOUR DOMAIN] -> Apache and Nginx configuration. I unchecked “Proxy mode” under “Nginx configuration”. I did it through the Plesk Panel using the root account.
I think with they added Apache with the Plesk update.
I would recommend a slight change in the deployment commands:
rm -rf tmp
(PATH=/opt/plesk/node/18/bin/:$PATH; yarn install && sed -i ‘s/const defaultCommand = “dev”;/const defaultCommand = “start”;/g’ node_modules/.bin/next && yarn build &> npm-install.log)
mkdir tmp
touch tmp/restart.txt
This will patch the node_modules/.bin/next file in case upon install it is overwritten.
Is it worth also deleting the .next folder before build? Or would that break a running app?
CORRECTION:
(PATH=/opt/plesk/node/18/bin/:$PATH; yarn install && sed -i ‘s/const defaultCommand = “dev”;/const defaultCommand = “start”;/g’ node_modules/next/dist/bin/next && yarn build &> npm-install.log)
Do NOT modify the symlink (node_modules/.bin/next) as I did above!
Hello! (wave)
thank you very much for your article (y)
in the deploy actions, why do you need the
mkdir tmp
touch tmp/restart.txt
?
Hi, thanks!
The touch tmp/restart.txt command is needed to restart the Node.js application automatically after deployment – when you touch the restart.txt file, it updates the timestamp on the file, which triggers the Node.js application to restart. This is a common technique used in many hosting environments to restart applications after deployment, otherwise you’d need to manually restart the app.
Hi there,
Thanks for this blog you have made. I have a problem when I run the script. When I build, I ‘get sh: 1: next: Permission denied’ hence my site isn’t up. Do you know why that happened? Appreciate so much if you can help with this.
Sure a couple of questions can help:
-Are you able to build locally?
-Have you got the right version of node running on your Plesk installation? Can SSH into Plesk and run `plesk ext nodejs –versions`
-Are you running Plesk Obsidian on Ubuntu 20.04.6 (What was used for the tutorial)
Hi,
1) Yes I am able to build locally.
2) Nodejs version installed on my Plesk is 16. Only 14 and 16 are available on my Plesk. In the Deploy Actions, I’ve put 16 instead of 18.
3) I am running on Plesk Obsidian 18.04.6
*on Ubuntu 18.04.6
Hey, thanks, this works perfectly but it also gives the node_modules with it which takes for me 600MB of size, my total size of website is 612MB which is alot for this small of a website. Any idea how to not send the node modules automatically and ignore that?
Thanks overall!
Sure, just finished writing a new blog post showing how to remove the node_modules folder:
https://mytchall.dev/removing-the-build-folders-when-deploying-next-js-on-plesk/
Lot of thanks, I was suffering the same issue with plesk.